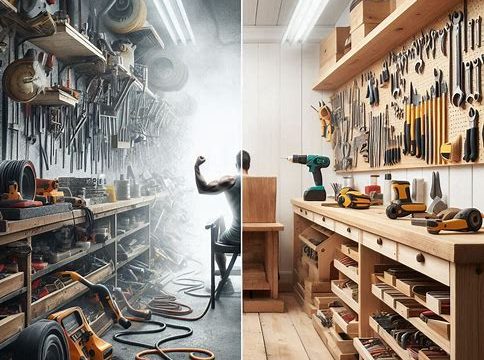
Are you eager to dive into the world of woodworking but don’t have access to power tools? Don’t worry! In this guide, we’ll explore three exciting beginner woodworking projects that you can tackle with just a few basic hand tools. These projects are perfect for complete beginners looking to develop their hand tool woodworking skills and create beautiful, functional pieces for their homes.
Essential Hand Tools for Beginner Woodworkers
Before we dive into the projects, let’s review the essential tools you’ll need:
- Hand saw
- Hammer
- Sandpaper (various grits)
- Measuring tape
- Pencil
- Wood glue
- Clamps
- Chisel set
- Workbench or sturdy table
[Image 1 description: A flat lay photograph of the essential hand tools listed above, neatly arranged on a wooden surface.]
For more information on choosing the best wood glue for your projects, check out our guide on selecting the right wood glue.
Project 1: Simple Wooden Shelf
Our first project is a straightforward wooden shelf that’s perfect for displaying books, plants, or decorative items.
Materials needed:
- 1×6 pine board (4 feet long)
- Two L-brackets
- Wood screws
- Wood stain or paint (optional)
Steps:
- Measure and mark your desired shelf length on the pine board.
- Using your hand saw, carefully cut the board to size.
- Sand the cut edges and the entire surface of the board using progressively finer grits of sandpaper.
- If desired, apply wood stain or paint to the shelf.
- Once dry, attach the L-brackets to the wall and secure the shelf.
Project 2: Rustic Picture Frame
Create a charming, rustic picture frame to showcase your favorite memories.
Materials needed:
- Four 1×2 pine boards (cut to size based on your photo dimensions)
- Wood glue
- Small nails
- Sandpaper
- Picture frame backing and glass (can be purchased at craft stores)
Steps:
- Measure and cut your boards to size using the hand saw.
- Sand all surfaces and edges of the cut pieces.
- Apply wood glue to the ends of the boards and assemble the frame.
- Use small nails to reinforce the corners.
- Once dry, sand any rough spots and add the backing and glass.
For tips on achieving clean cuts with your hand saw, visit our article on tips and tricks for clean cuts.
Project 3: Wooden Coat Rack
This functional coat rack is both practical and stylish, perfect for entryways or bedrooms.
Materials needed:
- 1×4 pine board (3 feet long)
- 3-5 wooden coat hooks
- Wood screws
- Wall anchors
Steps:
- Cut the pine board to your desired length using the hand saw.
- Sand the board thoroughly, paying extra attention to the edges.
- Mark evenly spaced points for your coat hooks.
- Pre-drill holes for the hooks to prevent splitting.
- Attach the hooks using wood screws.
- Mount the coat rack to the wall using appropriate anchors.
[Image 2 description: A series of four photos showing the progression of the coat rack project, from cutting the board to the finished product mounted on a wall.]
Mastering Hand Tool Techniques
As you work on these projects, you’ll develop essential hand tool woodworking skills. Here are some tips to improve your technique:
- Practice proper saw technique: Keep the saw at a 45-degree angle and use long, smooth strokes.
- Master the art of sanding: Start with coarse grit and progressively move to finer grits for a smooth finish.
- Learn to use a chisel: Essential for cleaning up joints and creating detailed work.
For more information on hand sanding techniques, check out our detailed guide on hand sanding.
The Benefits of Hand Tool Woodworking
Working with hand tools offers several advantages for beginners:
- Develops a deeper understanding of wood properties
- Improves hand-eye coordination and precision
- Provides a quieter, more meditative woodworking experience
- Requires less space than power tool setups
Expanding Your Woodworking Skills
As you become more comfortable with these basic projects, you can expand your skills by trying more complex techniques:
- Learn about mortise and tenon joints for stronger furniture construction.
- Explore card scrapers as an alternative to sandpaper for smooth finishes.
- Try your hand at restoring vintage furniture using hand tools.
Conclusion
These beginner woodworking projects without power tools are just the start of your journey into the world of hand tool woodworking. With practice, you’ll develop your DIY woodcraft skills and be able to tackle more complex projects. Remember, the key to success is patience and persistence.
[Image 4 description: A collage of the three completed projects – the wooden shelf, rustic picture frame, and coat rack – displayed in a home setting.]
Don’t forget to check out the ads on our sidebar for great deals on woodworking supplies and tools to support your new hobby!
FAQs
- Can I complete these projects in a small space?
Yes! For more ideas, see our article on woodworking projects for small spaces. - What’s the best wood for beginners to work with?
Pine is an excellent choice for beginners due to its softness and affordability. - How long does it take to complete these projects?
Each project can typically be completed in a weekend, allowing time for glue and finishes to dry. - Can I use these techniques for larger projects?
Absolutely! As you gain confidence, you can apply these skills to more complex pieces. - Are there any safety concerns when working with hand tools?
Always wear safety glasses and work gloves. Keep your tools sharp to reduce the force needed and minimize the risk of slips.
By following this guide, you’ll be well on your way to creating beautiful woodworking projects without the need for power tools. Happy crafting!

